Often times entering the address for a dock in Google Maps or other navigation software will take drivers to the front office instead of to the actual dock. This results in lost time for the driver and interruptions for the front desk staff.
We created the Dock411 Facility Map to help solve this problem. Utilizing this tool allows companies and drivers to show the exact location of the dock, yard entrance, best route in, and so on. This page will provide instructions on how to create a great Facility Map.
Facility Map tools
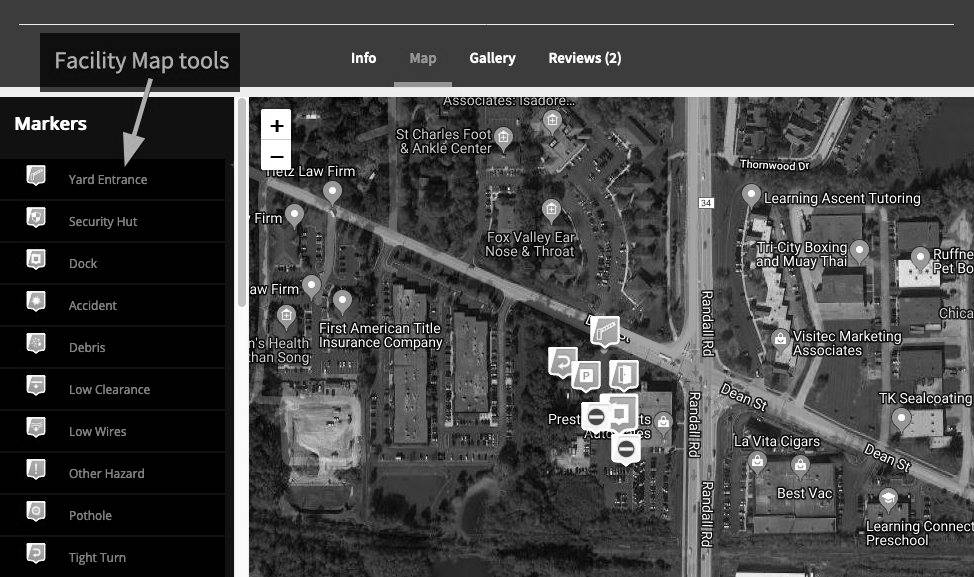
After clicking the Update Details or the Improve Listing buttons on the Dock Details page and then clicking on the Map tab, users are taken to the Facility Map editor. Along the left side are the current tools available: Markers and Routes.
Adding a new marker
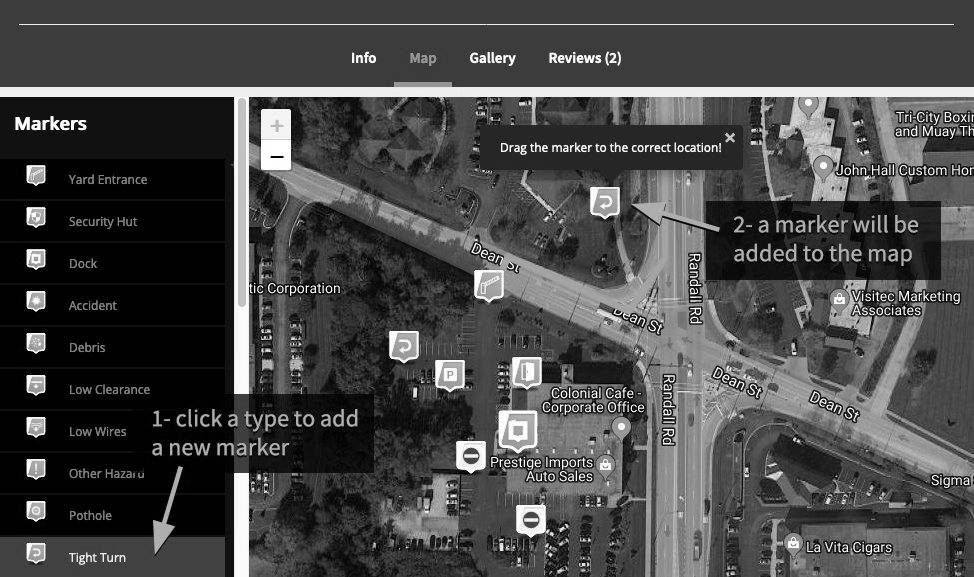
Click a type to add one of the several markers to the map. The marker will then be automatically added.
An easy rule of thumb when adding markers is to add one for each item that will help drivers get in and out of the facility quickly and safely. Scroll through the markers to see which are available.
We have dock specific markers such as Scales and Washes and also potential hazards like Low Clearance and Tight Turns. Drivers find the Yard Entrance and Security Hut markers especially helpful.
Moving the markers

After a marker has been added simply click, hold, and drag the marker to its correct spot. Any existing markers can also be moved while editing the map.
Try to avoid stacking markers on top of each other and instead put them side by side. The main idea is to let drivers know what to look out for and not pinpoint precision.
Updating the marker details
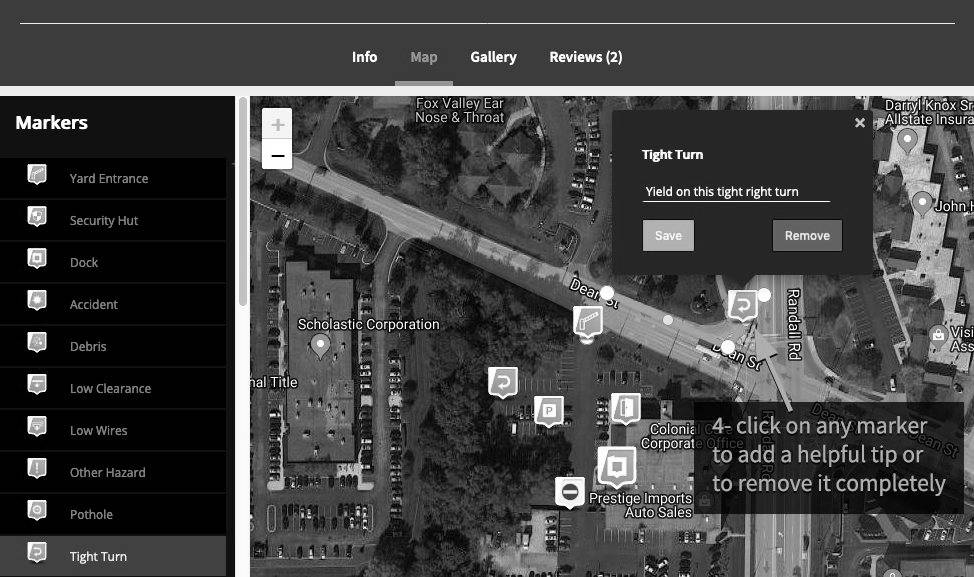
Clicking on a marker will bring up a dialog box for adding a name or tip to the marker itself. After making changes simply click the “Save” button.
Markers can also be removed using this dialog box by clicking the “Remove” button.
Adding a new route
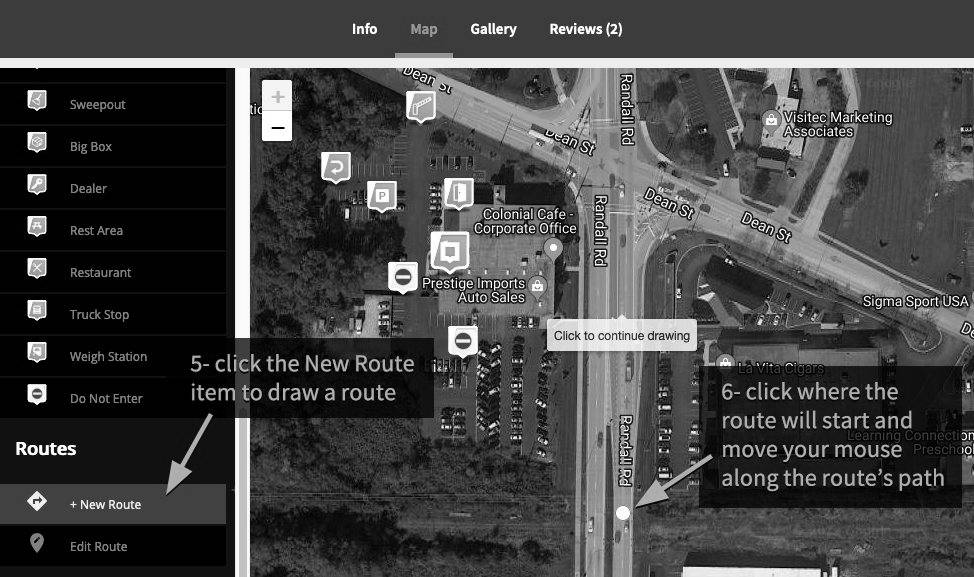
Routes show drivers the best path to take to get to the dock. Click the “New Route” tool to draw a new route on the map. Next click the spot where the new route should begin and continue moving your mouse cursor along the route’s path. A dashed orange line shows where the route will be placed.
Finalizing a route
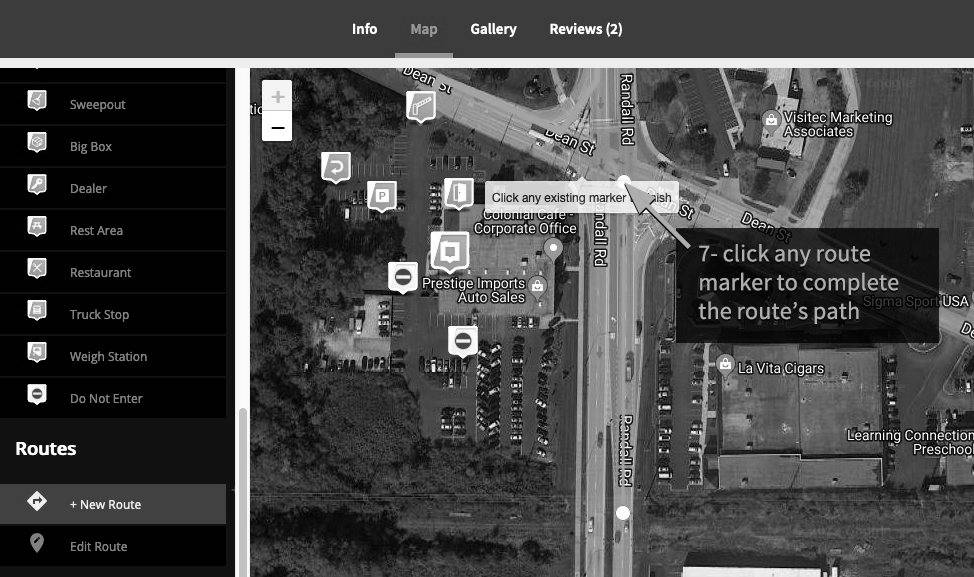
After the route has been drawn click any existing route marker to finalize the route.
Editing routes
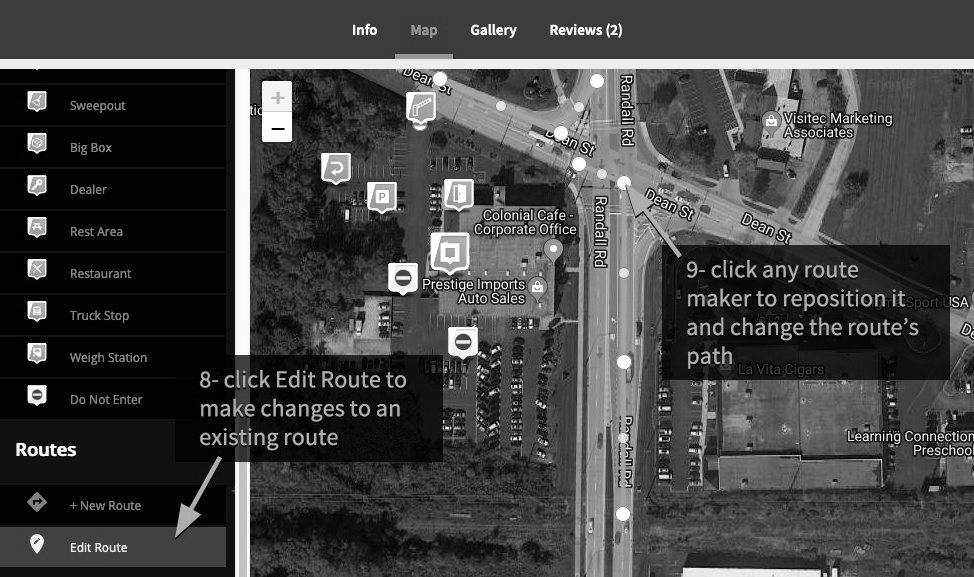
Routes may change in the future due to road construction or possibly with the addition of a new road completely. Click the “Edit Route” to update existing routes. Next click any route marker to reposition as needed and set the route’s new path.
Saving the changes
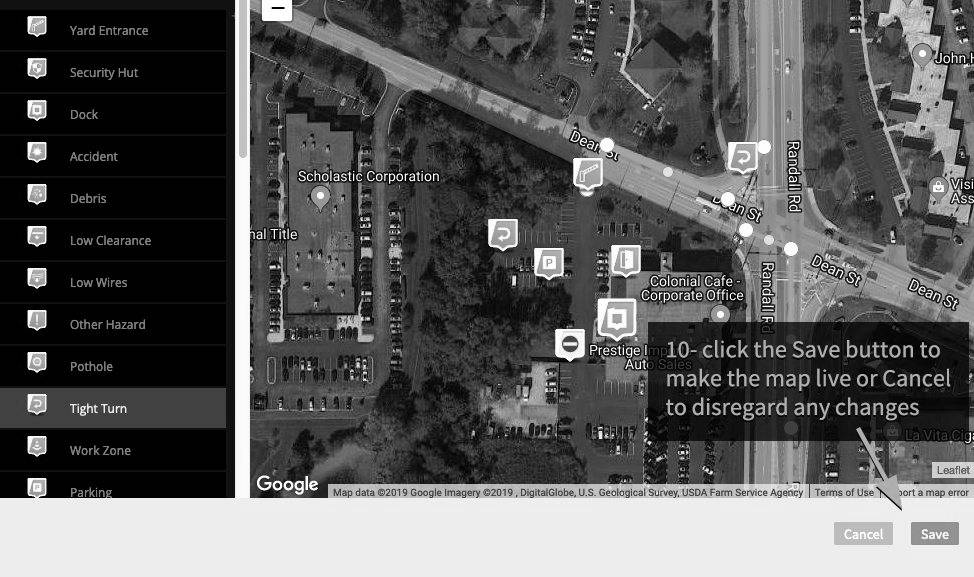
After the Facility Map updates are finished click the “Save” button to make the map changes live immediately, or click the “Cancel” button to disregard any modifications.
When drivers have the details about shipper facilities, when they know about the hazards beforehand they’re less likely to cause damage to company property. They’re also more likely to load and/or unload in timely manner which saves everyone time and money.