Part two of the Dock411 App tutorial series is about the most used parts of the app: the Dock Detail page. When drivers use the app to research information about their next stop, they’ll eventually find themselves in the dock detail page. However, with over 70 attributes, facility photos, a map of the location and more, it can be overwhelming for users who are new to Dock411. The goal of this article is to explain the screen and make it a little easier to understand.
To present the information, the Dock Detail page is organized into four tabs. As an aside, the tabs were determined based on feedback from our driver users.
The first of the tabs is the “Details” page. In this section, you can find the 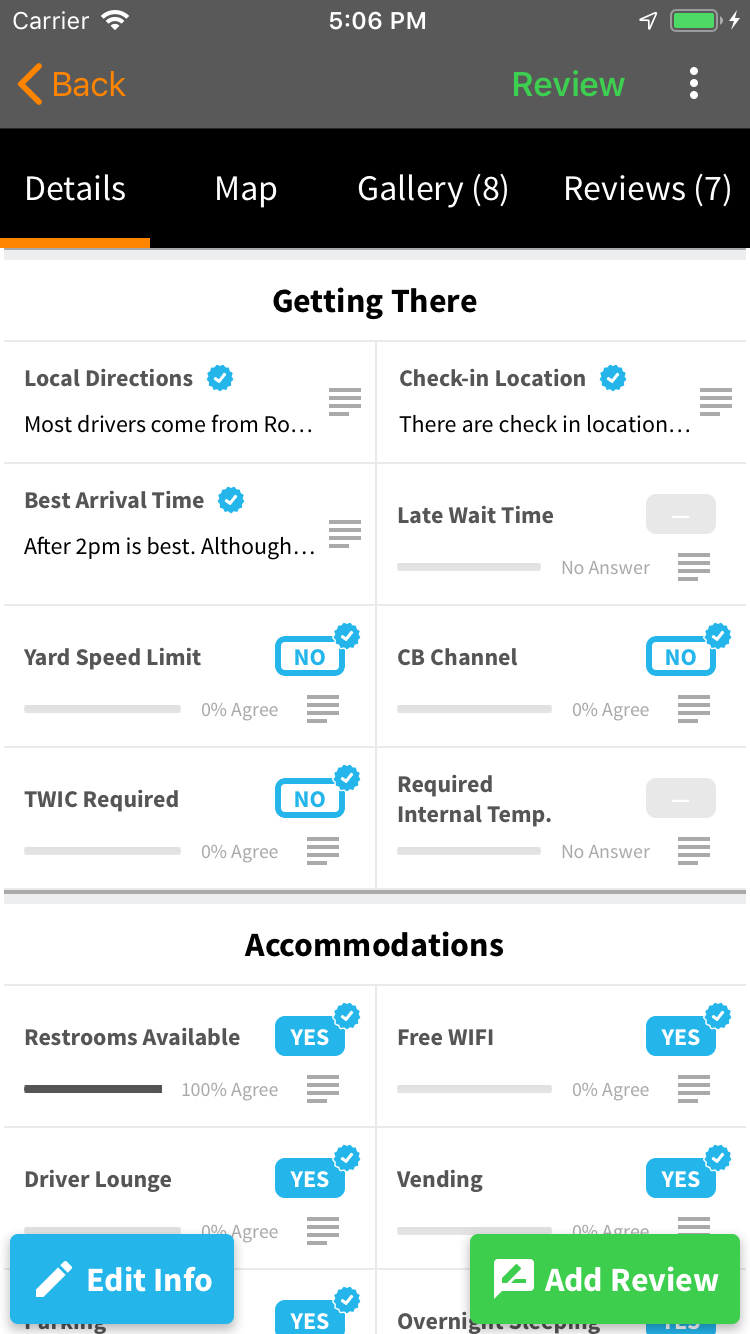 information drivers told us they wanted to see first. This is where we have most of our 70+ attributes, grouped into sections by importance and category. Among these are “Getting There” (Local directions, check-in location, etc…), “Safety & Procedures” (Procedure, Product Specifications, etc…), and “Accommodations” (Restrooms, Driver lounge, etc…). On each attribute, there is a chance you might see a blue checkmark. Every time you see a blue checkmark through the app, that means the company has entered and confirmed that data themselves. Drivers can take the checkmark as an assurance that the info is correct. If they don’t want to take the companies word for it, they can also tap the “Detail” button located on each attribute. That opens a new window with a breakdown of the companies answer and comment, along with all previous driver answers. This way drivers can see if there is a significant difference between what the other drivers have said and what the company says.

The second section is the “Map” tab. On this tab, we display a map centered around the dock’s location. We also display map markers that help draw attention to any important points in and around the property. In addition to that, we can show specific routes that might be important for drivers to know about going in. A shipper / receiver can use our web app ( LINK app.dock411.com ) and manage their dock’s map including all the markers and routes. The functionality will eventually be included in the app, allowing drivers to mark-up the map themselves.
The third tab is “Gallery with photos and videos of the dock. Usually this includes the yard entrance, any important signs or any thing a driver might need a heads-up for. A user can also add photos on this tab. To do this, just tap the “+ Add Photos” button, select the ones you want, then tap “Done”. The photos will automatically upload and are immediately available for other drivers to see.
The fourth and last section is the “Reviews” tab. Here, you can view all the previous reviews that drivers have submitted. On the list, we show a summary of the 10 review points, along with the driver’s comment (if there is one). You can also tap on each row and see a breakdown of their review. There’s also another “Add a Review” button so drivers can easily review shipper / receivers.
There’s a lot more included in this dock page than just the details. In my next article, I’ll cover how a driver can add their experience to the Dock411 app. We’ll talk about the difference between dock “reviews” and “assessments”, correcting important information that may be wrong (dock name, location, etc…), and the upcoming facility map editor.